
How to Prevent Moisture in Lyophilized Samples
Table of Contents
- What You’ll Need Before You Start
- Step 1: Control Moisture During Primary and Secondary Drying
- Step 2: Set Residual Moisture Targets and Use the Right Analysis Methods
- Step 3: Manage Post-Lyophilization Handling to Prevent Moisture Re-Absorption
- Step 4: Choose the Best Storage Conditions for Lyophilized Coenzymes
- How Moisture Affects the Long Term Stability of Lyophilized Peptides
- Common Mistakes to Avoid
- Troubleshooting Moisture Spikes After Lyophilization
- Frequently Asked Questions
Last Updated: September 23, 2026
What You’ll Need Before You Start
Moisture is the quiet enemy of every lyophilized sample. A vial that looks perfect can lose potency in weeks if water sneaks back in. This guide from FROPeptides walks through how to prevent moisture in lyophilized samples, from the drying cycle to the storage shelf.
Before you start, gather these basics:
- A calibrated freeze-dryer with shelf temperature control
- A residual moisture test kit or Karl Fischer titration setup
- Airtight vials, stoppers, and crimp seals
- Desiccant packs rated for your storage volume
- A humidity meter for your handling room
- Gloves, a lab coat, and a laminar flow hood
Step 1: Control Moisture During Primary and Secondary Drying
Primary and secondary drying are the two stages where you set the moisture foundation. Get them wrong, and no amount of storage care will save the batch.
Shelf Temperature and Eutectic Temperature Limits
The eutectic temperature is the point where a frozen sample fully solidifies. Keep the shelf temperature below that limit during primary drying. If you push too warm, the cake melts, collapses, and traps water. That trapped water shows up later as a moisture spike.
Vacuum Ramping and Pressure Control
Vacuum ramping means pulling pressure down in controlled steps instead of all at once. Sudden drops cause bumping, where the sample boils over and leaves residue on the vial walls. Ramp slowly and hold pressure steady through primary drying.
Watch your condenser temperature, not just your shelf. If the condenser warms up, water vapor backs up into the chamber and re-wets the cake. A cold condenser is your first line of defense.
Step 2: Set Residual Moisture Targets and Use the Right Analysis Methods
Residual moisture is the water left in a sample after drying. It is the single number that predicts how long your sample lasts. Most lyophilized samples should land between 0.5% and 3% residual moisture, though the exact target depends on the compound.
Karl Fischer Titration and Other Techniques
Karl Fischer titration is the standard method for moisture content analysis. It measures water directly through a chemical reaction and gives you a precise number. Other options include:
- Thermogravimetric analysis for a fast estimate
- Near-infrared spectroscopy for non-destructive checks
- Loss-on-drying for rough screening only
Never rely on loss-on-drying alone for a release decision. It also drives off volatile compounds, so it reads high. Use Karl Fischer titration when the number actually matters.
Step 3: Manage Post-Lyophilization Handling to Prevent Moisture Re-Absorption
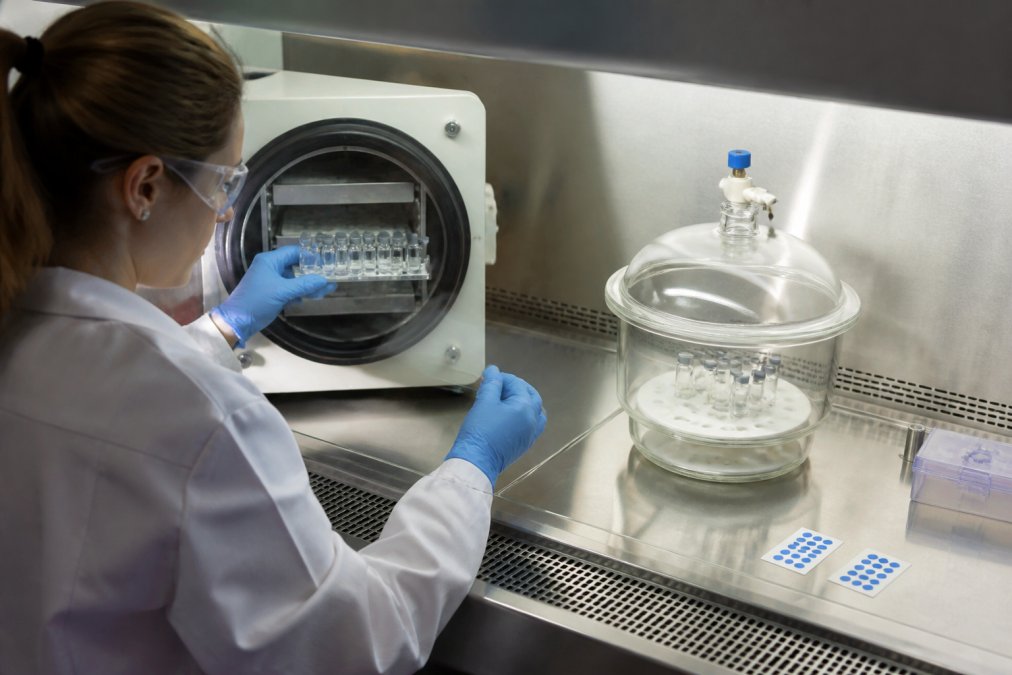
A Bench-Level Retrieval Protocol
Most practitioners find the following sequence keeps re-absorption to a minimum:
- Pre-chill the transfer environment. Bring the desiccator, secondary containers, and any trays into the hood or low-humidity room before opening the dryer, so everything is at equilibrium and you are not introducing warm, moist surfaces.
- Stage the desiccant first. Have fresh desiccant already in the desiccator and in each secondary container. Do not add desiccant after the vials are exposed.
- Work in a laminar flow hood or a glovebox. A horizontal or vertical laminar flow hood keeps particulates off the sample, but it does not dehumidify the air. Pair it with a dry-air purge or place a desiccant tray inside the hood workspace.
- Minimize open-vial time. Set a hard rule, for example, no vial stays open longer than the time it takes to move it from the dryer tray to its sealed container. Practice the motion before you open the chamber.
- Seal immediately. Crimp or screw-cap each vial as it is removed. Do not batch-seal at the end of the run.
- Log the exposure. Note the room’s relative humidity and the approximate open time for each batch. When a moisture spike appears later, this log is the first place to look.
Environmental Humidity Control and Aseptic Processing
Keep your handling room at low relative humidity, under 20% is the common target for hygroscopic biologics, and under 10% is used for very moisture-sensitive compounds. A room dehumidifier alone is usually not enough; a dedicated dry room or a glovebox with a desiccant loop gives more reliable control. Use a calibrated humidity meter, not a wall gauge, and record readings at the start and end of each handling session.
If you cannot stopper in situ and cannot access a dry room, a glovebox purged with dry nitrogen is the next best option. It is slower than a hood, but it gives you a controlled atmosphere instead of filtered room air.
Do not assume a laminar flow hood protects against moisture. It protects against particles. If the room air is at 45% relative humidity, the hood is delivering 45% relative humidity air across your open vial.
Step 4: Choose the Best Storage Conditions for Lyophilized Coenzymes
Storage decides whether your sample holds its moisture target for months or loses it in days. The best storage conditions for lyophilized coenzymes combine cold temperature, low humidity, and a sealed barrier, but the barrier is where most people get it wrong, because not all vials, stoppers, and desiccants perform the same way over a multi-month hold.
Desiccant Selection and Storage Containers
Desiccants absorb stray moisture before your sample can. The choice of desiccant matters more than most guides admit, because different materials hold different amounts of water at different relative humidities.
- Silica gel is the common choice. It is inexpensive and works well above roughly 40% relative humidity, but its capacity drops sharply at low humidity, exactly the range where you are storing.
- Molecular sieve (type 3A or 4A) pulls more water at low humidity and holds it tightly. It is the better choice for long-term storage of very moisture-sensitive compounds, though it costs more and can adsorb some volatile organics if the vial is not fully sealed.
- Clay (montmorillonite) desiccants are a middle option, cheaper than molecular sieve, better low-humidity performance than silica gel.
- Indicator desiccants change color as they saturate, which lets you see at a glance whether a container’s desiccant is spent. Use them in secondary containers, not inside the sample vial.
| Container Type | Best For | Moisture Barrier |
|---|---|---|
| Glass vial with butyl stopper and crimp seal | Most samples, long-term | High |
| Amber glass with desiccant | Light-sensitive compounds | High |
| Screw-cap plastic tube | Short-term holds only | Moderate |
| Sealed foil pouch with desiccant | Shipping and bulk storage | High |
If you are storing for more than six months, use a two-layer barrier: the crimped vial inside a sealed foil pouch with its own desiccant. The vial protects the sample; the pouch protects the vial.
Match the desiccant to your humidity range, use butyl stoppers on glass vials, and add a second barrier for long holds. The container is not a formality, it is the last line of defense against re-hydration.
How Moisture Affects the Long Term Stability of Lyophilized Peptides
The long term stability of lyophilized peptides depends almost entirely on residual moisture. Water drives hydrolysis, which breaks peptide bonds and degrades the sample. It also lowers the glass transition temperature, the point where the cake softens and loses structure.
Moisture-Linked Degradation and Stability Testing
Higher moisture means faster product degradation. Stability testing at set intervals shows you the real shelf life, not the assumed one. Test at 0, 3, 6, and 12 months, and track moisture alongside purity.
Residual moisture is the leading predictor of peptide shelf life. Control it during drying, protect it during handling, and confirm it with Karl Fischer titration.
Common Mistakes to Avoid
- Stopping secondary drying too early to save time
- Opening vials in room air instead of a hood
- Skipping desiccants in storage containers
- Using loss-on-drying for release decisions
- Letting the condenser warm between runs
Each of these lets moisture back in. Fix them and your failure rate drops fast.
Troubleshooting Moisture Spikes After Lyophilization
A moisture spike is a sudden jump in residual water after a batch looked fine. Find the cause before you blame the dryer.
- Spike right after drying: secondary drying ran too short. Extend it.
- Spike after sealing: a bad crimp or worn stopper let air in. Check your seals.
- Spike during storage: the desiccant was spent or the container failed. Replace both.
- Spike in one vial only: handling error during sampling. Retrain the step.
Frequently Asked Questions
What is the ideal residual moisture content for lyophilized peptides?
For most lyophilized peptides, the target residual moisture content is below 1% to 3%, depending on the formulation and intended use. Moisture content above this range accelerates hydrolysis and other degradation pathways. Use Karl Fischer titration or loss-on-drying to verify each batch. Setting a specification based on stability testing data ensures you catch moisture problems before they affect product integrity.
How does atmospheric humidity affect lyophilized sample stability?
Lyophilized cakes are hygroscopic and porous, so they absorb atmospheric moisture rapidly once a vial is opened or inadequately sealed. High relative humidity in the workspace accelerates this uptake. Handling vials in a controlled low-humidity environment, ideally below 30% relative humidity, and sealing them immediately after removal from the freeze-dryer reduces moisture ingress and preserves sample integrity.
What are the best storage containers to prevent moisture ingress in lyophilized samples?
Use glass vials with butyl rubber stoppers and aluminum crimp seals for the best moisture barrier. Add a desiccant sachet inside secondary packaging to absorb any residual moisture. Store containers in a temperature-controlled environment and avoid repeated opening. For long term stability of lyophilized peptides, consider heat-sealed foil pouches with integrated desiccant for an extra layer of protection against water vapor transmission.
Why is secondary drying critical for preventing moisture in lyophilized products?
Primary drying removes free ice through sublimation, but a significant amount of bound water remains. Secondary drying raises the shelf temperature to desorb that bound water and bring residual moisture down to target levels. Skipping or shortening secondary drying leaves excess moisture in the cake, which promotes degradation during storage. Monitoring shelf temperature and vacuum pressure during this phase ensures you reach the specified moisture endpoint.
Moisture control in lyophilized samples comes down to discipline at every stage: drying, testing, handling, and storage. FROPeptides supports that discipline with lab-verified research peptides and lyophilized coenzymes, backed by multi-stage HPLC testing, mass spectrometry verification, and batch-level Certificates of Analysis for full traceability. Get started with FROPeptides and keep every vial at its target moisture from dispatch to analysis.